

Application of Single Minute Exchange of Die (SMED): Methodology and Identifying Elements
Introduction
In today’s highly competitive manufacturing environment, organisations are constantly searching for ways to improve productivity, reduce waste, and respond quickly to customer demand. One of the most effective lean manufacturing tools developed for this purpose is the Single Minute Exchange of Die (SMED) methodology. SMED focuses on reducing machine setup times and minimising downtime caused by changeovers between production runs.
SMED is especially useful in industries where multiple products are manufactured in small batches, requiring frequent equipment adjustments and tooling changes. By reducing setup times, companies can improve flexibility, increase production efficiency, reduce costs, and respond faster to customer orders.
What is SMED?
Single Minute Exchange of Die (SMED) is a lean manufacturing methodology designed to reduce machine setup and changeover times to less than ten minutes (“single-digit minutes”). The methodology was developed by Shigeo Shingo, a Japanese industrial engineer and consultant who worked with Toyota during the 1960s.
Shingo studied the lengthy process of changing dies in manufacturing equipment and applied industrial engineering principles such as task analysis, process simplification, and standardisation. Through these improvements, Toyota successfully reduced die changeover times from 10–12 hours to approximately 10 minutes.
The concept of SMED is not limited to manufacturing dies alone. It applies to any process involving setup changes, equipment adjustments, or transitions between operations.
Objectives of SMED
The primary objective of SMED is to minimise downtime during changeovers. However, the methodology provides several additional operational benefits:
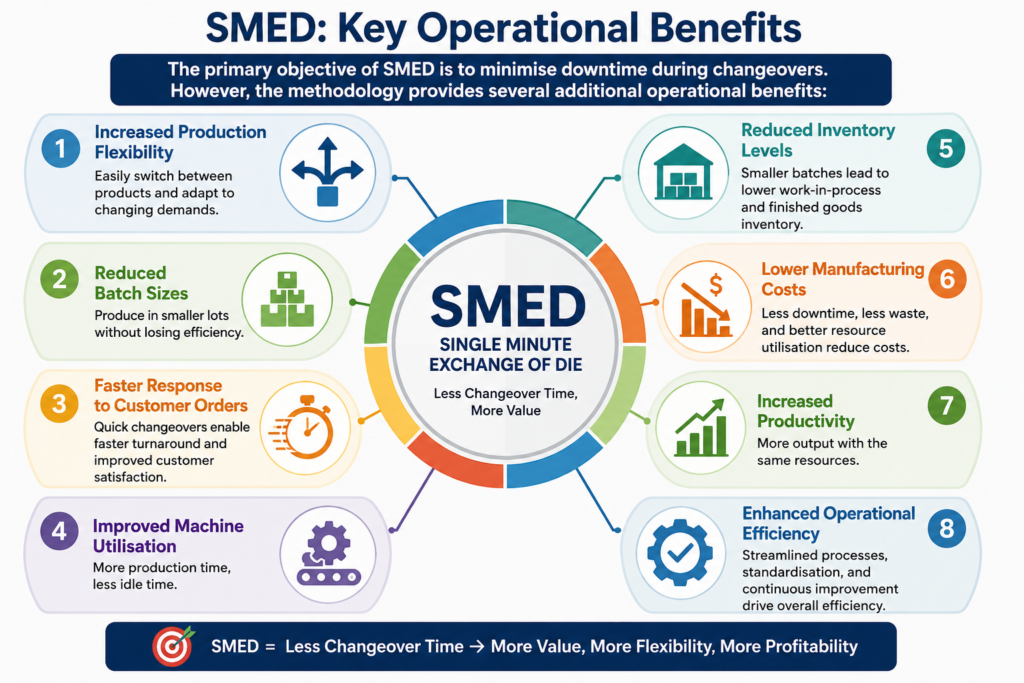
SMED is often described as focusing on the “3 Ups”:
- Change-ups – reducing changeover time
- Set-ups – improving machine preparation efficiency
- Start-ups – reducing delays when restarting production
Applications of SMED in Manufacturing
SMED is particularly effective in environments where products frequently change or where small-lot manufacturing is required. Typical applications include:
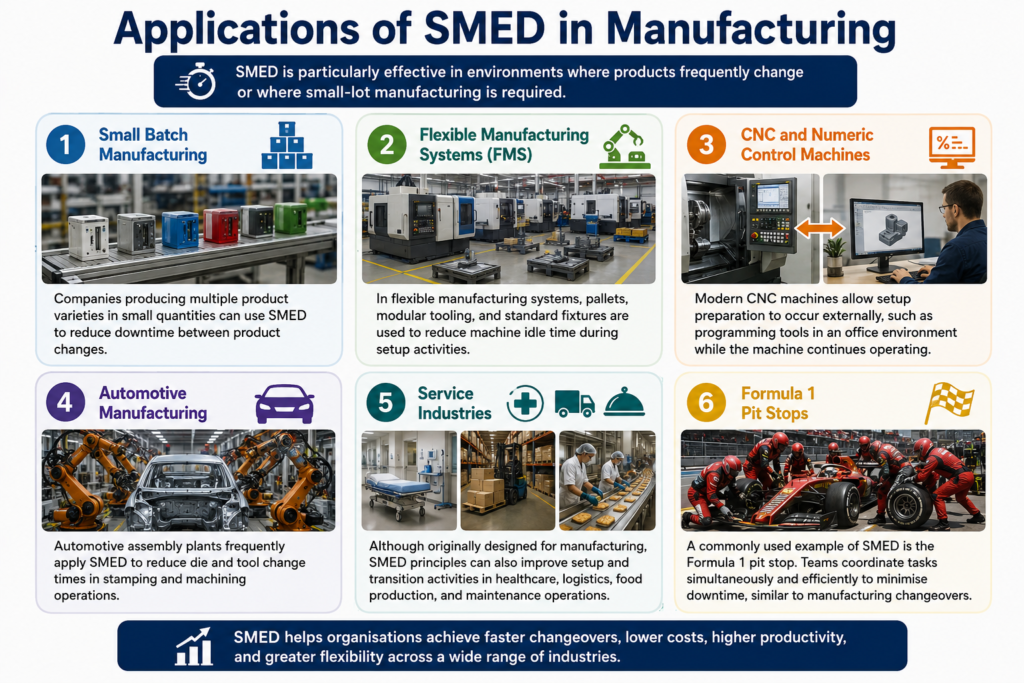
SMED Methodology
The SMED methodology follows a structured process designed to identify waste and streamline setup activities.
Shigeo Shingo’s Four Setup Principles
Shingo proposed four key areas for setup improvement:
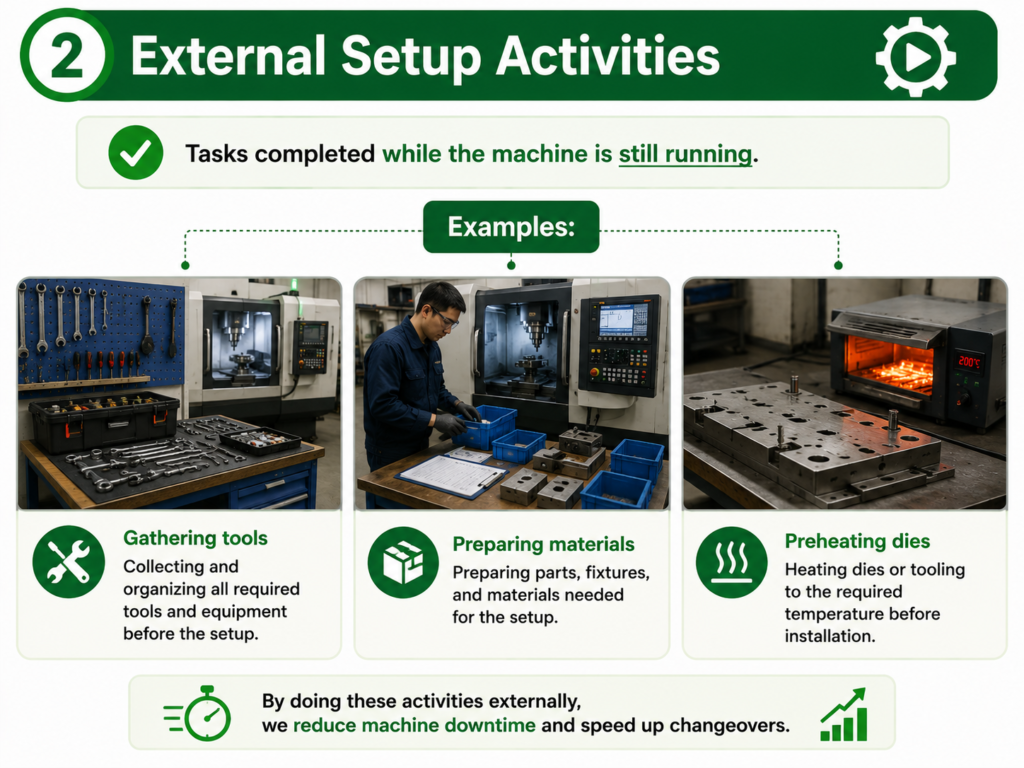
- Preparation
Organising tools, materials, and equipment before the setup begins. - Removing Tools and Parts
Efficiently removing existing tooling and components. - Settings and Measurements
Standardising adjustments and reducing measurement time. - Checking
Ensuring the setup is correct and production can restart immediately.
Detailed SMED Implementation Steps
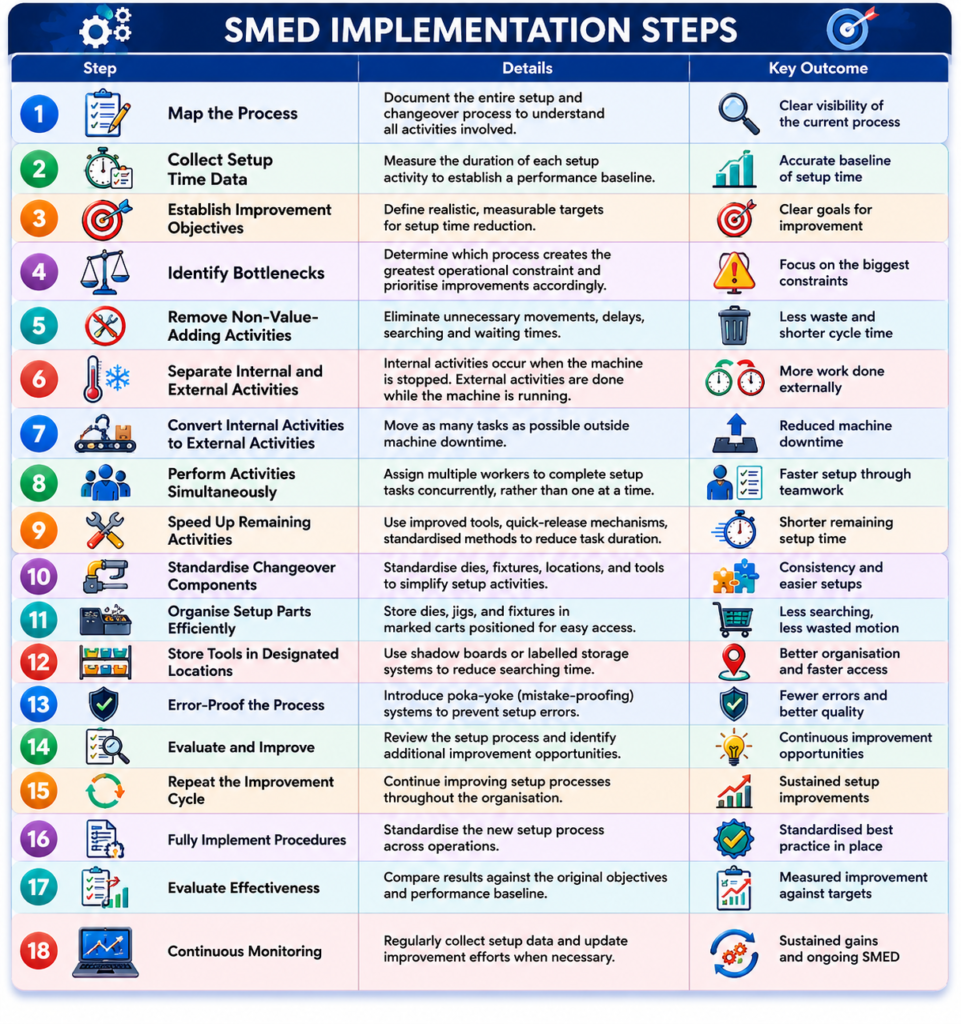
Furterer and Douglas (2021) expanded the SMED methodology into a detailed implementation framework..
Detailed SMED Implementation Steps
Furterer and Douglas (2021) expanded the SMED methodology into a detailed implementation framework.
Identifying Elements of SMED
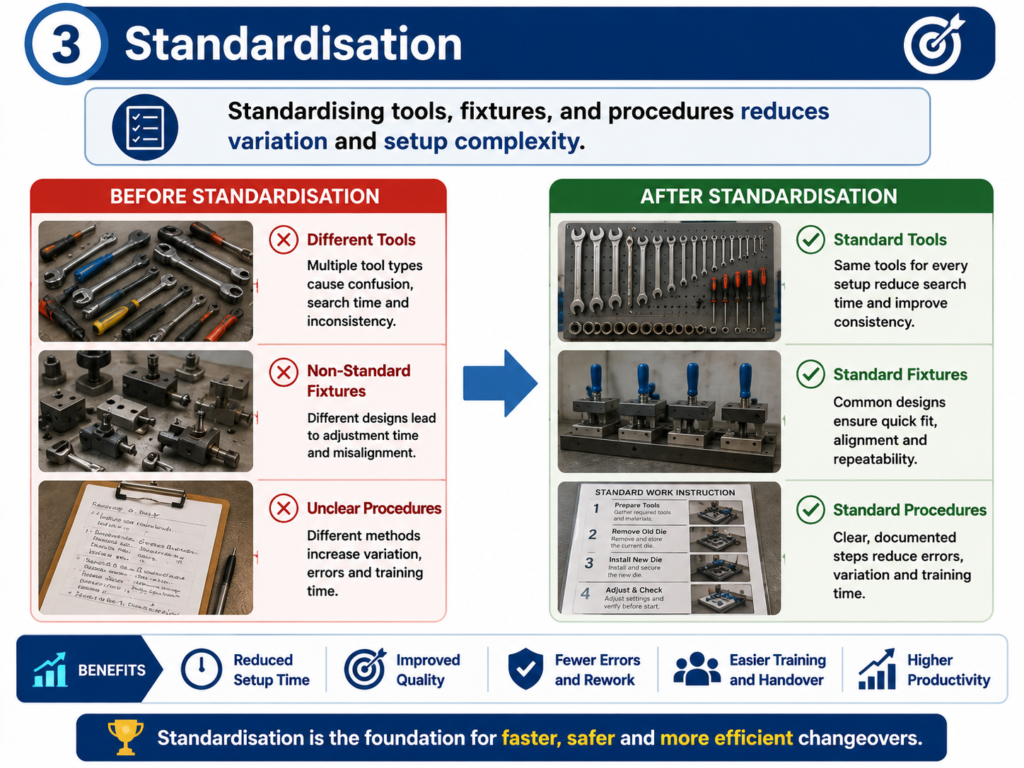
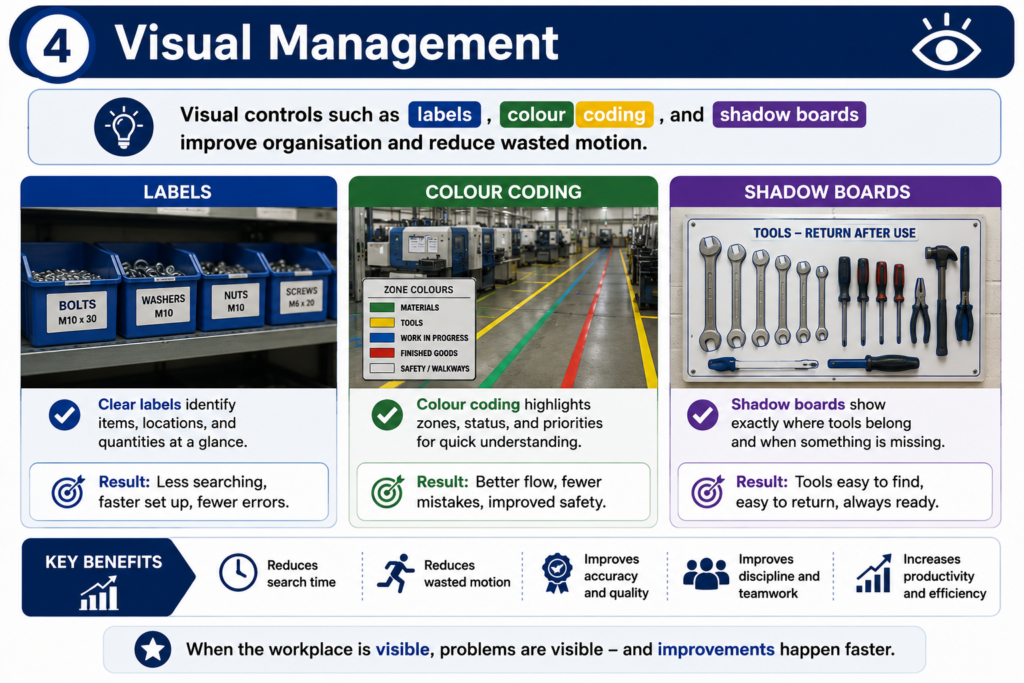
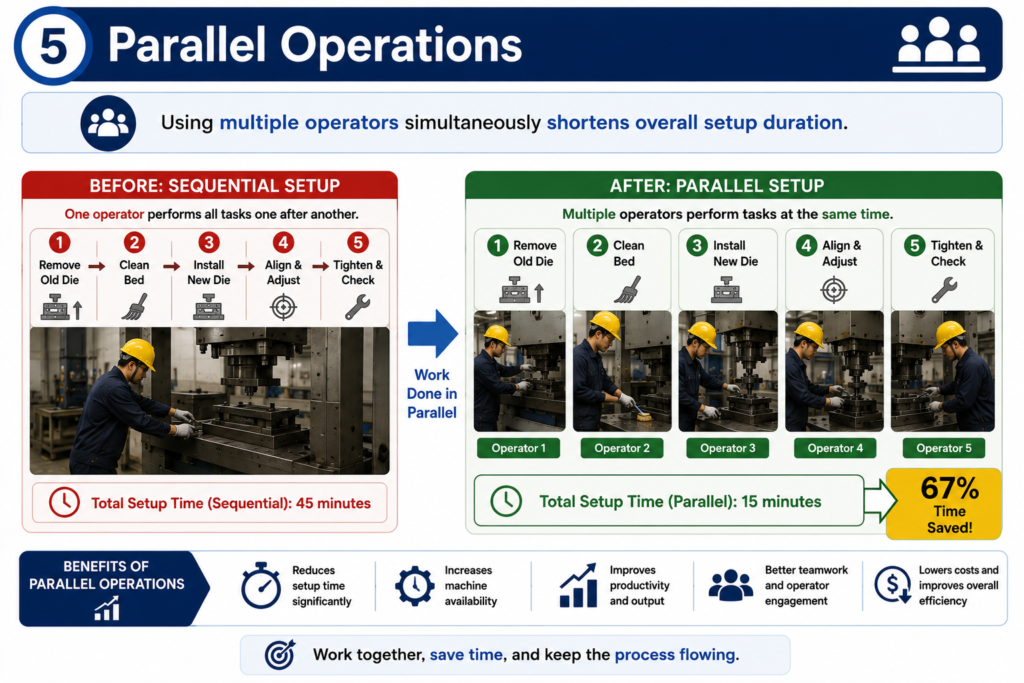
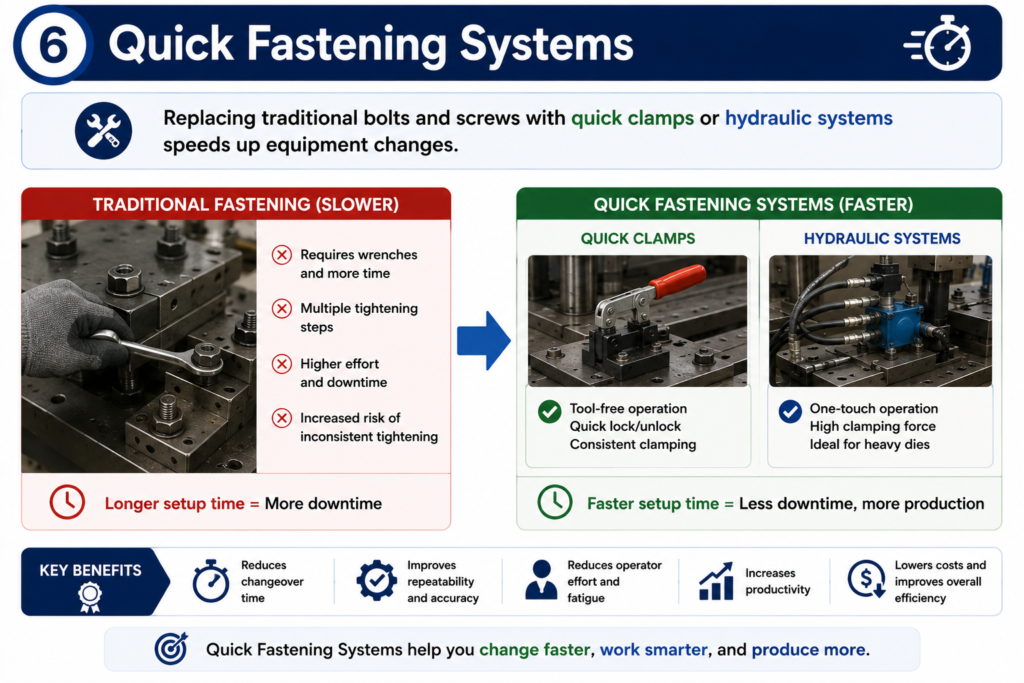
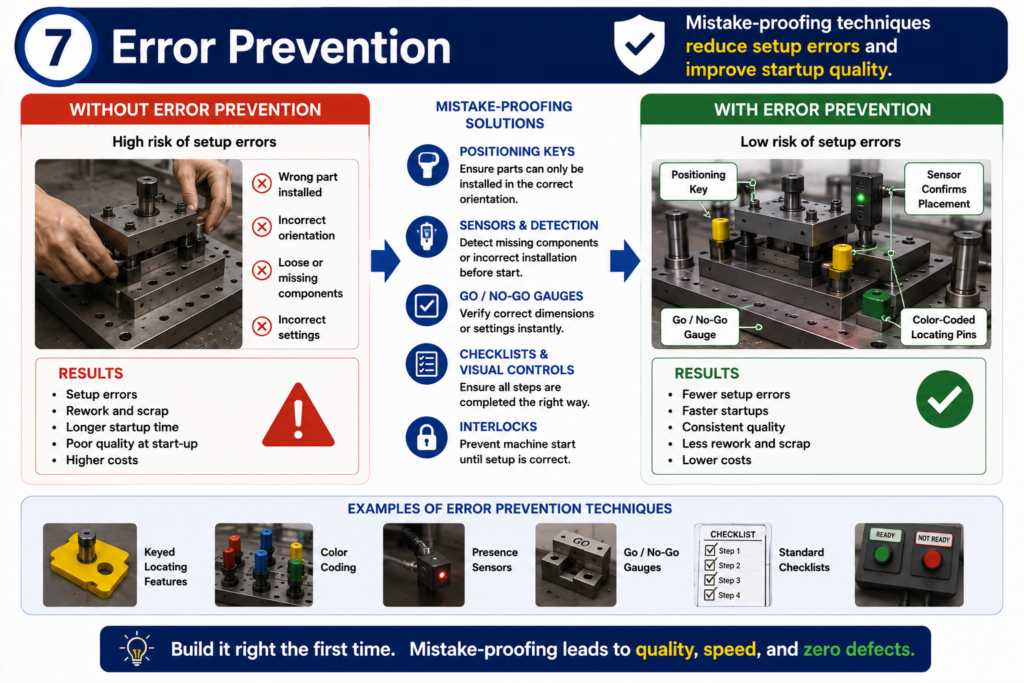
Several critical elements contribute to successful SMED implementation.
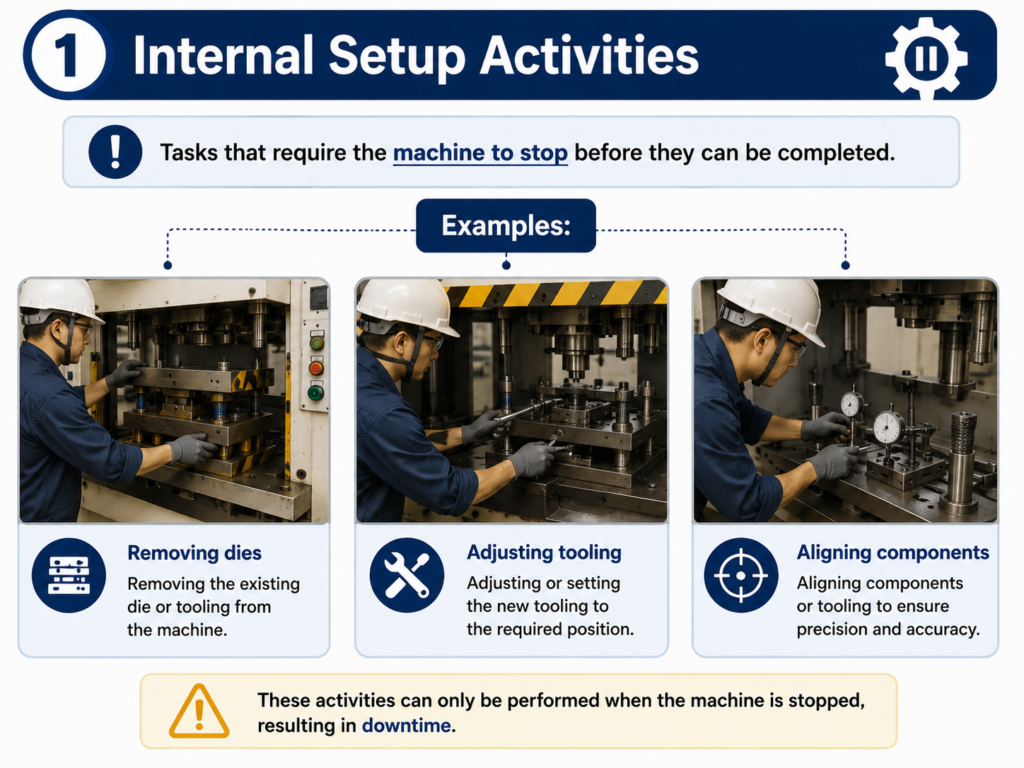
Benefits of SMED
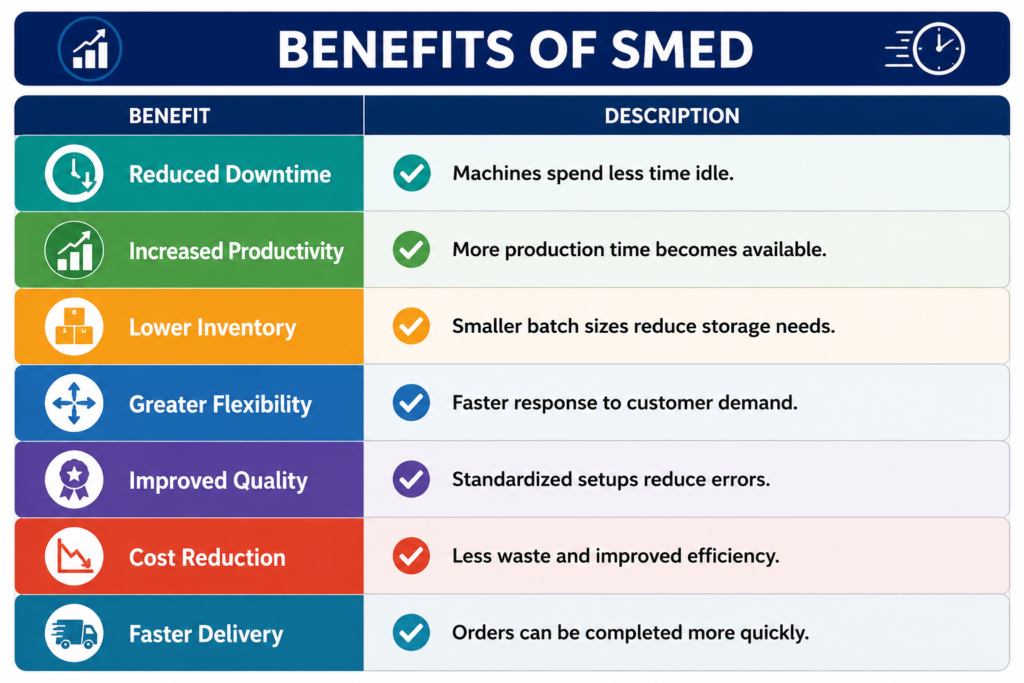
Successful SMED implementation provides several organisational advantages.
Challenges of SMED Implementation
Despite its benefits, organisations may face challenges when implementing SMED:
- Resistance to change from employees
- Lack of training or expertise
- Initial investment in tooling or equipment
- Difficulty standardising older machinery
- Insufficient management support
Successful implementation requires employee involvement, continuous improvement culture, and management commitment.
Conclusion
Single Minute Exchange of Die (SMED) is one of the most effective lean manufacturing tools for reducing setup and changeover times. Developed by Shigeo Shingo, the methodology has transformed manufacturing operations by improving efficiency, flexibility, and productivity.
By separating internal and external setup activities, eliminating waste, standardising procedures, and continuously improving operations, organisations can dramatically reduce downtime and respond more effectively to customer demands.
Today, SMED is widely used across manufacturing industries and service sectors as a key strategy for operational excellence and continuous improvement.
Interested in our Industrial & Manufacturing Engineering Courses?
At iLearn Engineering®, we offer a diverse range of online accredited Industrial, Manufacturing and Mechanical Engineering courses and qualifications to cater to different academic and career goals. Our industrial courses are available in varying credit values and levels, ranging from 40 credit Engineering Diplomas to a Bachelor’s equivalent 360 credit International Graduate Diploma.
All Industrial / Manufacturing Engineering Courses
All Industrial / Manufacturing Engineering Diploma Courses can be seen here.
All Mechanical Engineering Diploma Courses can be seen here.
Short Courses for Industrial Engineering (40 Credits)
- Diploma in Manufacturing
- Diploma in Composites, Smart Materials & Nanotechnology
- Diploma in Lean Manufacturing
- Diploma in Mechanical Technology
- Diploma in Electrical Technology
- Diploma in Material Science
First Year of Undergraduate (Level 4 – 120 Credits)
Higher International Certificate in Industrial Engineering
Higher International Certificate in Mechanical Engineering
Years One and Two of Undergraduate (Level 5 – 240 Credits)
Higher International Diploma in Industrial Engineering
Higher International Diploma in Mechanical Engineering
Degree Equivalent International Graduate Diplomas in Engineering Management and Mechanical Engineering (Level 6 – 360 Credits)
International Graduate Diploma in Engineering Management (Level 6) [120 Credit Top Up]
International Graduate Diploma in Mechanical Engineering (Level 6) [120 Credit Top Up]
Complete Engineering Course Catalogue (all courses)
Alternatively, you can view all our online engineering courses here.
Get started today
Explore our range of Industrial and Manufacturing Engineering courses
Recent Posts
Types of Aircraft Drag Explained: Induced, Profile and Interference Drag
Types of Aircraft Drag Explained: Induced, Profile and Interference Drag An aircraft experiences several forms of aerodynamic drag at the same time. Some result from generating lift, some arise as air flows over the aircraft’s surfaces, and others are created when airflow around neighbouring components interacts. For a conventional aircraft in subsonic flight, total drag […]
Induced Drag Explained: Why Flying Slower Can Increase Drag
Induced Drag Explained: Why Flying Slower Can Increase Drag Why can an aircraft experience more drag when it flies more slowly? We usually associate greater speed with greater air resistance, but a wing must also generate enough lift to support the aircraft. Induced drag is the drag associated with producing lift on a finite-span wing. […]
Laminar vs Turbulent Boundary Layers: Why Airflow Separates from Aircraft Wings
Laminar vs Turbulent Boundary Layers: Why Airflow Separates from Aircraft Wings Airflow around an aircraft wing is often shown as smooth streamlines passing neatly over the aerofoil. In reality, the thin layer of air immediately next to the wing surface behaves very differently from the undisturbed airflow further away. This region is called the boundary […]